Next, log back onto your account, you will notice that there is a counter at the top next to your profile picture. These are your notifications. It will contain a notification for your approval for the document. Click on the notification to see the documents that require your approval. In this case, you will see the document you have just added. This document requires approval from you and the Approver account you added to the Project Manager user group. All the users in the group must approve this document before other users can access it on their dashboard. Approve this document by following the steps below:
- Locate documents that require your approval by doing one of the following:
- Click on the notification counternext to the profile picture
- Click on the ‘Pending My Approval’ Quick Filter
- Find the document you want to approve.
- Click on “I” icon to view extra detail. Click on top right icon to go to the view document details page.
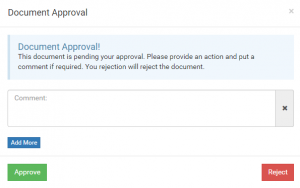
- Click the “Approve “ or “Reject” button corresponding to your choke.
- Review the document by either:
- Click on ‘View’ to download in PDF format
- Click on ‘Download Original’ to download the original format
- Optional: You can add as many comments as you want for your approval or rejection.
- Choose ‘Approve’
After all approvers have approved the document, it is accessible from the dashboard by users with Read access. If you log onto the Viewer account, you can now select the document group and download the document in PDF format.
There are added benefits from distributing the members of your project into roles defined by user groups. If you wanted to remove a user’s access permissions, you can remove them from the user group instead of updating their permissions for each document. If someone leaves the project, instead of removing them from every document group and document, you simply have to remove them from a user group.

